Hexagon Measurement SystemsNo matter what Hexagon measurement equipment or software you use, we want to hear your ideas and suggestions on how we can improve.
Thanks for your assistance in helping us shape the future. |
|

 Animation of a part program should be more realistic
We should improve PC-DMIS form a graphical animation of a mesurement routine to a kinematic simulation. Then we can also check execution times and we can see also different speeds betwenn a move and a measurment inside of a feature.

 Intervention limit for selected nominal dimension comparisons
Required: Define a separate action limit for each individual characteristic in the measuring program.
e.g: Characteristic 1 --> intervention limit 85%
Characteristic 2--> no intervention limit
Characteristic 3--> intervention limit 70%
Eingriffsgrenze für ausgewählte Nennmaßvergleiche
Es ist nur möglich eine Eingriffsgrenzen zu definieren (z.B. 80% oder 90%), die dann für alle Merkmale im Messprogramm wirksam ist.
Wunsch: Für jedes einzelne Merkmal im Messprogramm eine seperate Eingriffsgrenze definieren.
z.B.: Merkmal 1 --> Eingriffsgrenze 85%
Merkmal 2--> keine Eingriffsgrenze
Merkmal 3--> Eingriffsgrenze 70%

 "Right click delete" to remove an unwanted Windows Layout icon
Deleting an unwanted Windows Layout icon should be more intuitive.
A user should be able to simply right click and choose "delete" in a context menu to remove, not Shift-Left Mouse Click and drag away. I'd also like to be able to rearrange the order the icons appear in the toolbar.

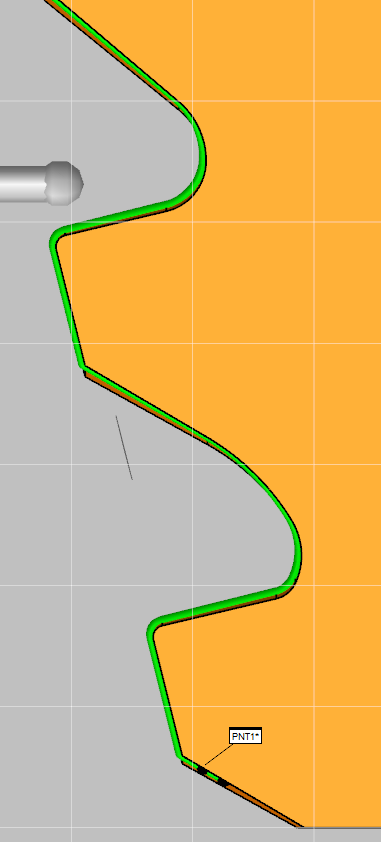
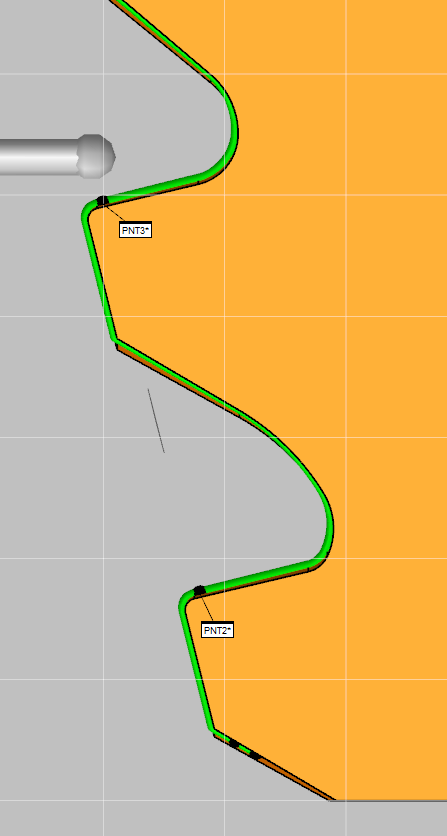
 Intersection points between curve and plane
At the moment when you construct an intersection point between plane and curve only the first intersection point (PNT1) will be construct. (see Picture 1)

We are needed every intersection point between curve and plane (PNT2 and PNT3). (see Picture 2)


 Collision Detection Speed Slide Adjustment Bar During Simulation

 Apply new default settings to existing projects
When a user changes his default report Template (ex: change the Logo), those new settings will be applied only on new projects.
If he has 1000 existing projects, there is no way to retro apply the new settings on the old project but changing one by one.

 Default feature color
I'd like to suggest a feature - to add an option to set the default colors for different types of features - i.e. by default every time i create a constructed feature its color on the cad model to be yellow and every time i create an auto feature its color to be red etc.
I am asking for this feature because atm whenever i start a new program or open an existing one by default all features are black and even if i set it manually the way i want it every feature i add to the program after i have set my colors is shown in black no matter where in the program i add the feature.
Also id like to suggest a global option for adjusting the features' colors for all programs because i would really like to avoid setting the colors for 1300+ programs manually one by one.
IMPO this would be extremely convenient if such an option is added to PC DMIS.

 Warning message reminder to save Program
Add a setting in the Setup Options for a save reminder. If a program is opened for a while, you will receive an warning message reminding you to save.

 Integrate leapfrog using touchprobe
Please integrate leapfrog using touchprobe. When doing the current leapfrog (measure last two straights) it is sometimes not possible to measure tubes with a very long straight (2000-3000mm) in between the bends with a "standard" tubearm. This will be possible using a traditional leapfrog (or two).

 QuickMeasure toolbar, make new sub icon menu
These openable icons are very useful. The new ones have been added, which is good. But I want to be able to create myself.
In this way;
- I get rid of the clutter.
- I gained from the area.
- I can make my own arrangements.
Customer support service by UserEcho


