Hexagon Measurement SystemsNo matter what Hexagon measurement equipment or software you use, we want to hear your ideas and suggestions on how we can improve.
Thanks for your assistance in helping us shape the future. |
|

 Report .CSV
Hello
Many of our customers want an excel output report (. CSV), but today only data is visible. Is it possible to make (in the next version) an automatic report in excel (with the logo, the customer's address, the image of the tube, etc....)
Kind regards

 In PC-Dmis when measuring a cylinder from the outside
When measuring a cylinder from the outside, a pin, with avoidance on, the probe approaches the center of the cylinder before moving to the first measure point on the outside of the cylinder. This is not a problem unless the center of the cylinder is outside the part and the probe attempts to plunge through the part wall. Please consider changing the routine to apply the avoidance to above the first measured point or add a toggle to allow the user to turn on that option.

 Having the option to select a variable as a lighting option instead of a percentage in lighting parameters
For example, in vision, you save lighting settings to percentages you want. I would like to have a setting where I can pick a lighting that I want on with a preset variable. Like Bottom Light = V999. Then the programmer can assign the variable at the top of the program.
So instead of it saying "Bottom Light=<off, 100, on>" it would say "Bottom Light=<off,V999, on>"
Instead of having to manually type this for every feature, it will hold the value as a variable rather than a number. This could potentially solve all lighting issues going forward and make it super easy for a programmer to update/change programs if needed. And if possible

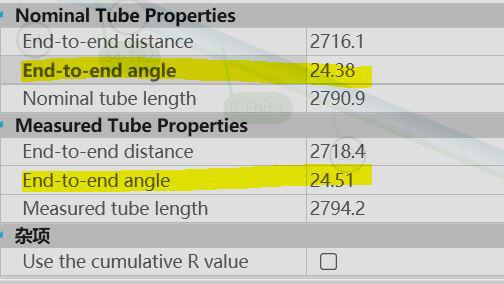
 End to end angle
The value of end to end angle is 45° in the workspace,but it's 0.4 in the report.


 Add a dropdown menu for the contruct feature window
Ad a drop down menu in the construct feature window to select what kind of feature you want to construct.
This makes constructing different feature's easier, and faster.
The function i'm looking for is already in place with the auto feature window, here you could start with a vector point, and then select the drop down menu to change to cylinder.

 Add due date minders for SMA and CMM maintenance
Add a due date minder for SMA ,and add a due date minder for CMM maintenance.
For example, PC-DMIS pop-ups a prompt to remind the operators that the SMA will expire in 3 months...
because this is closer correlated with measuring application.

 "Manual" Alignment of Pointcloud
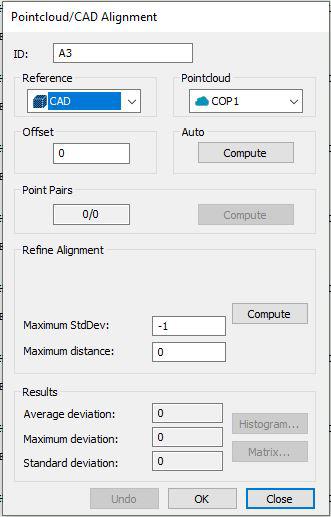
It would be nice to have the opportunity to manually (by using mouse) align pointcloud to cad model, or one pointcloud to other pointcloud and from here make eventualy refine alignment. Idea is to put with mouse COP on CAD or other COP to lock this on specific area.Thanks to this it would be easier to align only partly scanned surfaces. Today even if I using point pairs sometimes alignment is moving far away from expected place. Actual functionality is working good only if whole part is scanned allround.
Kundesupport af UserEcho


