Hexagon Measurement SystemsNo matter what Hexagon measurement equipment or software you use, we want to hear your ideas and suggestions on how we can improve.
Thanks for your assistance in helping us shape the future. |
|

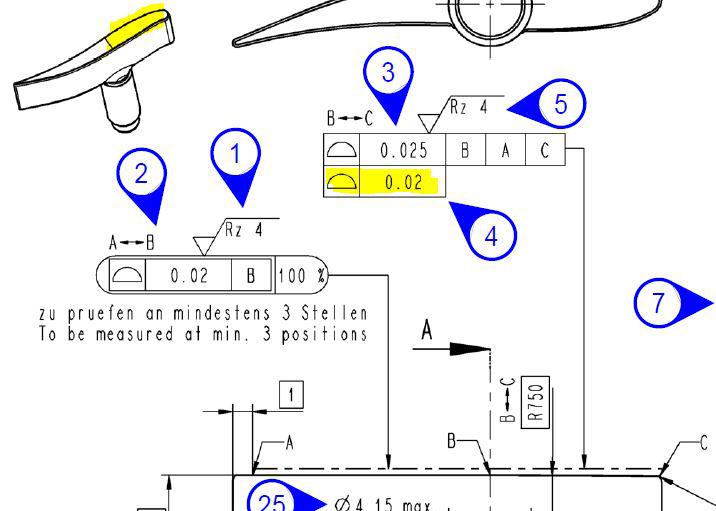
 PC-DMIS 2020R2 does not recognice a small free-form surface for evaluation
Subject Ticket 00253352.
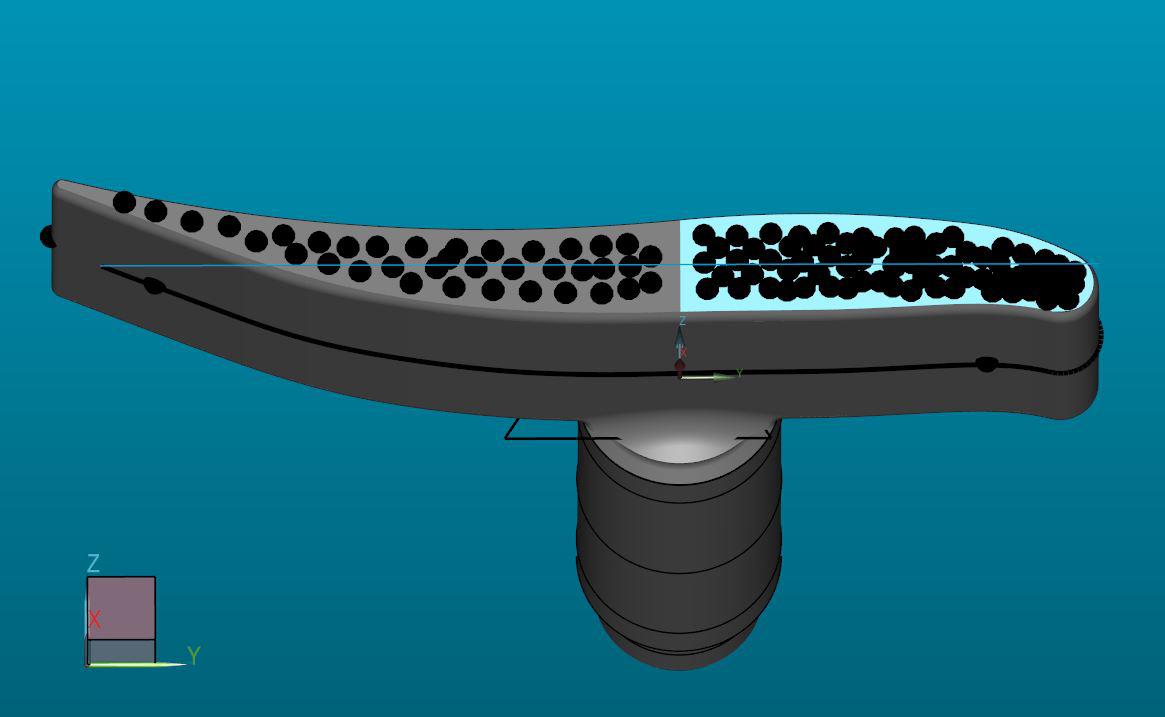
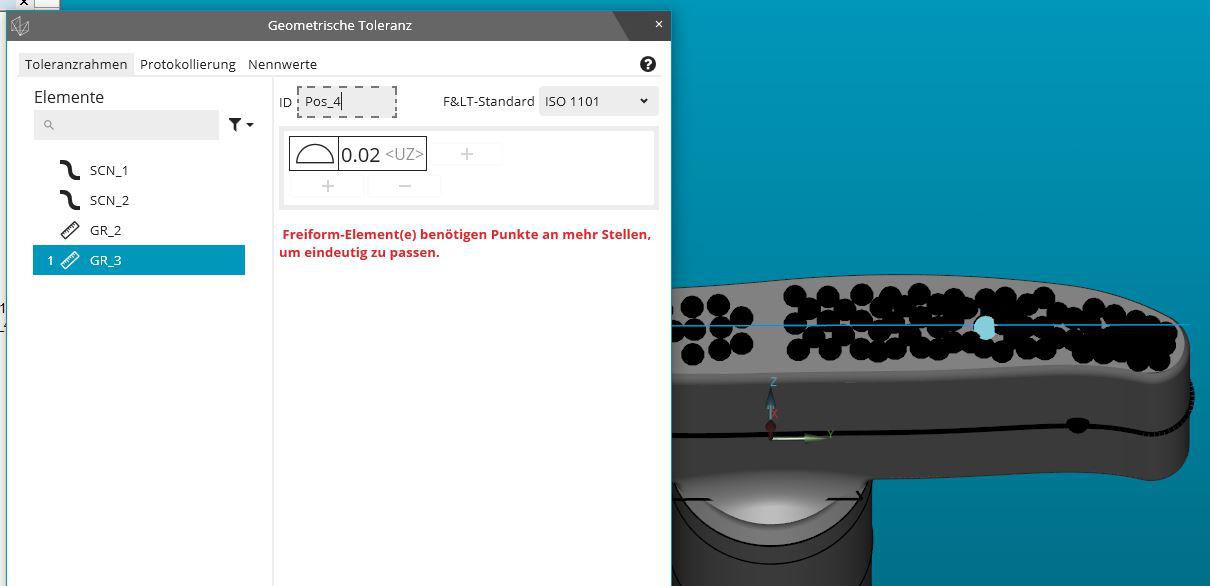
PC-DMIS 2020R2 does not recognize a small free-form surface. The element group created is recognized by PC-DMIS as a line and can therefore only be evaluated as a line shape.
In version 2020R1, this free-form surface was still recognized as a surface.
Please ask for correction of this problem.


 Turn CAD Assembly Items on and off with code
If a program has part of an assembly being measured for the sake of an alignment and then you need to add a part to measure what you need, or to show deviation before and after assembly. Use code to turn model items on or off as the program is executing.

 Rounded Polygon Auto Feature
Auto Features should include Rounded Polygons, called "Stoffel Polygon" . They are generated by plotting through an equation. would be nice to be able to find some inspection dimensions from it. See Machinist Handbook.

 WINDOW / TEXT RESIZING FOR ALL FEATURE DIALOGUES
Every pop up window should be resizable and allow for increased text size for easier viewing. Ergonomics should always be a priority....

 PROBE LIST SCROLL BAR FOR PROBE CHANGER
There should be a scroll bar for the probe list drop down in the Probe Rack, when adding or changing what is in a port.
I have asked for this in the past...should have been there from the beginning.

 HIGH CONTRAST THEME
high contrast theme for PC-DMIS. Windows has one, but the tool bar buttons down appear so well.
Also, the EDIT WINDOW FONT colors are not very bright.

 What is wrong with this 2020 version?
1. Why can't I access the most recent programs?
2. Why can't I edit nominals in the geometric tolerance tab?
I've been using this software for the past 7 years and this is one of the worst versions of the software. When you did this update, why couldn't you keep everything you had before and just add new things instead of playing with all of the old things?

 FIX XACT MEASURE (DATUM SHIFT ERROR)
XACT MEASURE SHOULD UTILIZE THE PCDMIS SIZE FUNCTION WHEN EVALUATING FOR DATUM SHIFT INSTEAD OF WHAT APPEARS TO BE L^2.
WHEN MEASURING A CASTING THAT HAD AN AS CAST DATUM ID DIAMETER THAT WAS 4.4300 +/- .020, THE ACUTAL MEASURED FEATURE WAS OUT OF ROUND AND MEASURED +.0218 AND -.0235 ON SIZE, BUT WHEN USING THE XACT MEASURE IT CALCULATED AN L^2 (LEAST SQUARES) AT 4.4286 ALLOWING FOR .0186 DATUM SHIFT. WHEN THE DATUM MATING EVELOPE IS LESS THAN THE LOWEST POSSIBLE SIZE YOU DO NOT GET DATUM SHIFT. THIS ERROR NEEDS TO BE FIXED IN ORDER TO FOLLOW ASME Y14.5.
Customer support service by UserEcho


